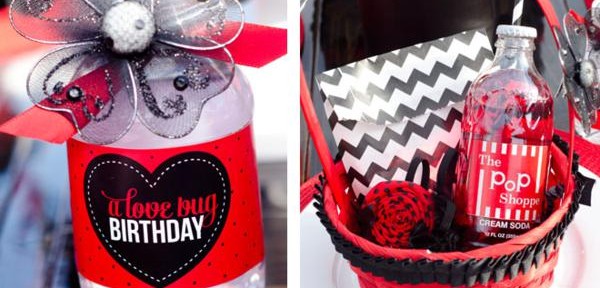
Ladybug “Love Bug” Birthday Party

You are going to love this LADYBUG “LOVE BUG” BIRTHDAY PARTY submitted by Lindi Haws of Love The Day! There are just so many cute elements…
Lindi said- “It’s been MONTHS since I’ve thrown a bash and I’ve been dying to get partying again! Plus, what better excuse to get to know my neighbors and new friends a little better? Coordinating with my new ladybug printable collection, I put together this ‘little lady’ celebration for the cute girls in my neighborhood. With the help of some amazing vendors and my cute mom of Sew Love The Day this party came together perfectly!”
Party Printables.Styling.Photography – Love The Day
Felt Ladybugs.Felt Shoe Clips.Felt Hair Bows – Sew Love The Day
Cupcake Stand – Pedestals
Chevron Favor Bags.Striped Straws.Polka Dot Cups – Sofie’s Big Day
Ladybug Dress – Wild Things Dresses
Ladybug Headbands.Bows – Shiloh’s Mystie Designs
Ladybug & Flower Cookies: The Cookie Jar
Cupcakes.Ladybug Truffles: The Sugar Shack
Ribbon Garland: A to Zebra Celebrations

Crab Boil Party

And the next feature goes to this fun CRAB BOIL PARTY submitted by Lindsey Marlor of
Pillow Thought. Such a great way to get a group of friends together. This looks so fun. Line a big table with newspaper, cook a lot of crab, melt some butter, add some seasoning and there you have it! 
Here is what Lindsey said about the party- “We had a crab boil with our friends this weekend and it tasted amazinggg! Plus, it was super fun to get everyone together! It all started because Edgar Hansen off of Deadliest Catch was at a grocery store near by selling crab & Ty had to “plan” a group date for a class.. so an “end of summer party” seemed like the perfect thing to have. Plus, the weather ended up being so nice this past weekend!  If you haven’t ever done a crab boil… you should definitely put it on your list!! Everyone needs to indulge in this experience!”
Menu:
Snow Crab
Shrimp
Potatoes
Corn on the cob

FREE Ice Cream Party Downloads/Printables & More!

A big welcome to all of you visiting from the Channel 2 Fresh Living Show. I loved being on the show today! And the rest of you…glad you are here too! Here are theFREE ICE CREAM SOCIAL PRINTABLES/ DOWNLOADSI promised {and some fun ice cream party tutorials below}. Just download, print & cut. A huge thank you to Kori of Paper & Pigtails for designing these printables exclusively for Kara’s Party Ideas! More Ice Cream Social party photos to come.
Keep reading/scrolling for some great Ice Cream Party activities… Photography by Lyndsey Fagerlund
Over the next two weeks I will be showcasing the latest party I planned….An ICE CREAM SOCIAL! This party was so much fun to style and put together. I am dreaming about ice cream all night long now! I’m starting off with the party activities
The first activity- ZIPLOCK BAG ICE CREAM Have the kids make their own ice cream in about 5 minutes with ziplock bags and simple ingredients. What you will need: - 2 tablespoons sugar - 1 cup half & half - 1/2 teaspoon vanilla - 6 tablespoons rock salt - 1 quart-size ziplock bag - 1 gallon-size ziplock bag - Ice cubes
How to make it: 1. Fill the large bag half full of ice and add the rock salt. Set aside. 2. Put half & half, vanilla and sugar into the small bag and seal it. 3. Place the small bag inside the large one and seal it again carefully. 4. Shake the bag until the mixture is ice cream, which takes about 5 minutes. 5. Wipe off the top of the small bag and open it carefully. Eat it! *Makes about 2 scoops of ice cream, so double the recipe if you want more. Don’t increase the proportions too much though– a large amount could be too heavy for kids to pick up.*
This second party activity is similar to the ziplock bag activity. It’s just one more way for the kiddos to make ice cream. Either one is super fun and easy….
KICK/ROLL THE CAN ICE CREAM
You will need:
- 1 pint half & half
- 1/3 cup granulated sugar
- 4 tablespoons of your favorite pudding mix
- 10 cups ice
- 1 1/2 cups rock salt {kosher salt or sea salt may be used too}
- 3-pound can, emptied and rinsed
- 1-pound can, emptied and rinsed
- Duct tape
How to make: 1. In a medium bowl, combine half and half, sugar and pudding mix with a whisk until mixed. 2. Place the 1-pound can inside the 3 pound can and pour ice cream mixture into the smaller can. 3. Cover the smaller can with it’s lid and seal with duct tape. 4. Surround the smaller can with ice and salt by layering 5 cups of ice with 3/4 cup of salt, etc. 5. Cover the 3-pound can with it’s lid and seal with duct tape.
6. Have the kids kick the can around! They can also roll the can back and forth on its side. Do this for 10 minutes.
7. After 10 minutes, open up the cans and check the ice cream.The mixture on the sides of the smaller can will set up faster than the center so use a rubber spatula to quickly scrape down the sides and give the ice cream one big stir. Replace the lid on the smaller can and reseal with duct tape.
8. Dump out the melted ice and place the smaller can back into the larger one. Surround the small can with new ice and salt and put the lid back on and seal with duct tape.
9. Ask the kids to roll or kick the can for 10 more minutes.
10. Once they’re done, open the cans and serve the ice cream to your little guests!
*Use your favorite flavor of pudding to change the ice cream flavor. *After the first 10 minutes of kicking the can, mix in some nuts, chocolate chips, or cookie crumbles to enhance the flavor of your ice cream.